Recently, we were blessed with a Keurig Kcup coffee maker - all I had to do was make it work, lol! It needed a good cleaning and some TLC, but I got it up and running.
Quickly, I realized how expensive this could become, if I wasn't resourceful.
I decided to make my own Kcups. Check it out!
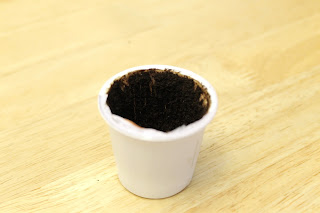
You start with something like this: A used Kcup. (Make sure it's cooled down).
1) Cut the foil off the top. It's easiest for me (though a bit messy) to start in the middle.
2) Peel off any excess.
Now you have this....
3) Carefully cut the old filter out. (I started with a small cut, and peeled it out with my fingers.) Also remove the plastic filter at the bottom.
4) Your Kcup is now clear of any materials. Rinse it out with cool water, making sure to get all the coffee grounds.
5) Insert a cone or flat coffee filter into the used Kcup.
6) Push it down into the Kcup, molding it to the bottom as much as possible.
7) Fold the sides of the paper coffee filter back over the side of the Kcup.
8) Pinch the sides around the Kcup, gathering the coffee filter as you go.
9) Cut away the excess paper, leaving a small lip around the top edge.
10) Fill with your favorite coffee! (Only about 3/4 full).
11) Cut a piece of foil, approx. 9" x 6", fold it in thirds the long way.
12) Fold it in thirds again, measuring about 3" x 4".
13) Fold the foil over your cup. You want a few layers on the top, and some overhang. (Otherwise, you get a big mess, and grounds in your coffee. No thanks!)
14) Pinch the foil around the top edge of the Kcup, just as you did with the paper coffee filter. Done!
Make sure you line up the original hole in the bottom of the Kcup with the needle in the brewing compartment on your machine. This leaves less room for error, spills and grounds in your coffee.
Enjoy!


