Thursday, March 5, 2015

A {Little} Love of Music

Often, people ask me whether we're going to put Ellie Jo in music lessons. The long and short of it is - well, yes! I want my little girl to have a love and appreciation for the arts, music and local/ community engagement. Along those lines, I desire more than anything for her to find a passion for something she loves, and just run with it. 

One of our family favorites is the Disney movie, "Secretariat." (When I say, "favorite," you can safely assume that we watch it a minimum of two or three times each week). In that movie, Chris Chenery tells his daughter, Penny, to "let him run his race, darlin'," in reference to Secretariat as a young colt. I could ask nothing more of my own sweet little girl, but to run her race! 

At 22 months (today!), she has a profound interest in many activities: KinderMusik (which she has participated in since she was 4 months old), horseback riding (we're hoping she can start doing Western Gaming this year), playing music (usually piano, but sometimes my guitar or violin), singing, cooking and baking, coloring and much more. 

Yesterday, I snapped this picture of her and posted it to my Instagram account

It instantly sparked about 75 "likes," and had several comments of how sweet and cute Elizabeth is. Most of my dad's friends (he is a professional musician), are blown away by how much she adores music.

Anyway, I decided to recreate this photo (with a bit nicer attire, lighting and camera of choice) today, after our Pastor asked me last night what I used to take the picture (my iPhone or my Canon), and then explained he was just curious, because we could do a lot more with it if it were on my professional camera. Don't get me wrong; I'm usually not opposed to leaving well enough alone. But we had time today, and she was in a great mood.

Here are the photos I got of her today, playing piano and singing for me:


While I hope this is the start of a keen interest in music like her mama, I do not want to have any expectations. I don't expect her to start with and stick with any one instrument (I certainly didn't!), and I don't expect her to want to play 8 or 9 different instruments (like me). I don't expect her to love to play chess or keep baseball stats (like her daddy and me). I don't expect her to want to do everything and be a perfectionist. I don't expect her to be a prodigy.

My only expectation for my precious little girl is that she grows to know, love and serve Jesus with her whole heart. If she finds her passion in music along the way, that would be wonderful, and we'll encourage her every step of the say.

Robert always jokes that "Mama plays it all; Daddy plays the radio." Even if she doesn't want to follow in my footsteps, I hope she at least starts with piano. She can decide what she wants to do after a few lessons with Mama.

But this is also why pictures like these are precious and priceless to me. It might seem counter-intuitive, but if she grows up to have nothing to do with playing piano, at least I have these cute pictures, lol!

My mom took some pictures of me when I was younger:


1st day of Kindergarten

 Sadly, I didn't grow up to be a ballerina, or a little princess. While I dabbled in cheer & dance.....


 .... I grew up to be a traveler (the above pics are me in Japan in 2002, meeting my dad's family)...

....extremely active athlete...
  .....music-addicted....
This is me, playing my dad's tuba in my Easter dress...
 .....soccer playing....


 ....softball loving....
 

....snowboarding...


....adventurer! 

I know my parents are still proud of me, and I'm glad they led me spread my wings early on in life!

When Ellie Jo is in her 20s like me, I don't want her to feel like she's missed out on anything. I want her to live like I strive to every day: 

"I don't want to get to the end of my life and find that I just lived the length of it. I want to have lived the width of it as well." - Diane Ackerman

Thursday, February 5, 2015

Blueberry Ricotta Breakfast Pastry

Photo credit:
http://usatoday30.usatoday.com/life
/movies/news/2007-06-26-food-movies
_N.htm
I woke up today with the desire not only to bake, but to create. 


This is what I came up with! :)


Don't get me wrong - I absolutely love reading recipes! Robert teased me the other night because I was up until the wee hours of the morning scouring Pinterest for recipes of various kinds to read and savor vicariously through fellow pinners. He even quoted one of my favorite movies, "No Reservations": "What are you doing? Reading a recipe, right?"

Well, when you put it that way.... :)

But I digress...

I recently bought an 18oz. container of fresh blueberries from the store. I must admit, it's slightly disappointing to me that we can't glean these delicious little antioxidant-packed berries from our garden. But perhaps next year's garden adventures will prove more fruitful (no pun intended) than last year's.

Anyway, I wanted to make a couple different things with these little beauties. The other night, I made Blueberry Lemon Scones:

If you follow me on Instagram, you've already
seen this picture :)
Sadly, the consistency wasn't scone-like (I think the warmth from my hands melted the butter, and there was not nearly enough flour in this recipe), and the glaze ended up being more absorbed than anything. Oh well.

So this was my second recipe this week with blueberries. One thing I started figuring out was that anything puff pastry-like or danish-ish would require like 6-8 cups of flour and half a pound of butter.

I say nay nay.

Instead, I made my own pastry dough! It's pretty much a cross between a puff pastry and a danish pastry - which is just fine with me! :)

Ingredients:
  • 1 1/4 c. all-purpose flour (you can use bread flour, gluten-free flour, almond flour or whatever you want - let me know how it turns out if you try something different!) 
  • 1/2 tsp. Sea Salt
  • 1/2 c. butter (8 tbsp.), cold, cut into small pieces (I cut mine into tiny triangles, but you certainly don't have to be that fancy) 
  • 1/4 c. very cold water (I measured this in advance, and kept it in the fridge until I was ready to add it)
  • 1/4 c. very cold milk (Like the water, I measured this in advance, and kept it in the fridge until I was ready to add it)
Directions:
  • In a medium bowl, combine the salt and flour. Mix well.


  • Cut the butter up into small pieces, being careful not to melt it with your fingers (don't touch it any more than you have to).


  • Put butter in food processor, then add the salt & flour mixture. Pulse briefly, just long enough to make the mixture crumbly and the butter is in pieces about the size of peas. You should be able to see small chunks of butter.


  • Pour mixture into medium bowl (the same one you used for the flour & salt, if you want to cut down on your clean-up!), make a hole in the center, and add the water & milk. Stir to combine everything with a large fork. (You can use a wooden spoon, but it will take longer).

  • On a floured surface, lay the dough out in a square or rectangle (your choice, depending on how you intend to use the dough and the shapes you need to cut). As you pat the dough, you'll see the butter still - this is what you want. Don't add any extra liquid; it should be very dry. 
  • Using a floured pastry roller or a rolling pin, roll the dough out to about 10". 


Obviously, 10" is subjective in my kitchen...

  • Fold the dough in thirds and roll it out. Repeat 5 times. 


  • Wrap the dough in plastic wrap, and allow it to chill in the refrigerator at least 1 hour to overnight. (If you're not using this right away, or if you plan to double the recipe to use more later, you can also freeze it). 
  • Roll out the dough and cut as you please. Make sure you use a floured surface and a floured rolling pin. 
Now for the fun stuff! The Blueberry Ricotta filling! :)

Ingredients:
  • 1 cup fresh blueberries (or any berries that you want!) 
  • 2 tbsp. granulated sugar
  • 2 tbsp. water
  • 3/4 c. ricotta cheese
  • 1 large egg (optional - I found that I really didn't need the egg, due to the consistency of the filling when it was finished)
  • 1 tsp. vanilla extract (you can add a little vanilla bean if you want, also! I think just about everything is better with some vanilla bean. I used 1/2 vanilla bean in mine. Just sayin'!)
  • Zest of 1 lemon (I only used about 1 tbsp.)
  • 2-4 tbsp. all-purpose flour, depending on how thick you want your filling. You can always add more later. (Again - if you experiment with a different flour, I want to hear about it!)

Directions:
  • Preheat the oven to 350 degrees.
  • In a medium saucepan, heat water, berries and sugar over medium-low heat. Cook 3-4 minutes, just enough to soften the berries (more or less time, depending on the type of berries you use). With the blueberries, I just cooked them until they "blushed" a little (AKA - when the color began to run a bit in the water). Remove from heat; set aside. 


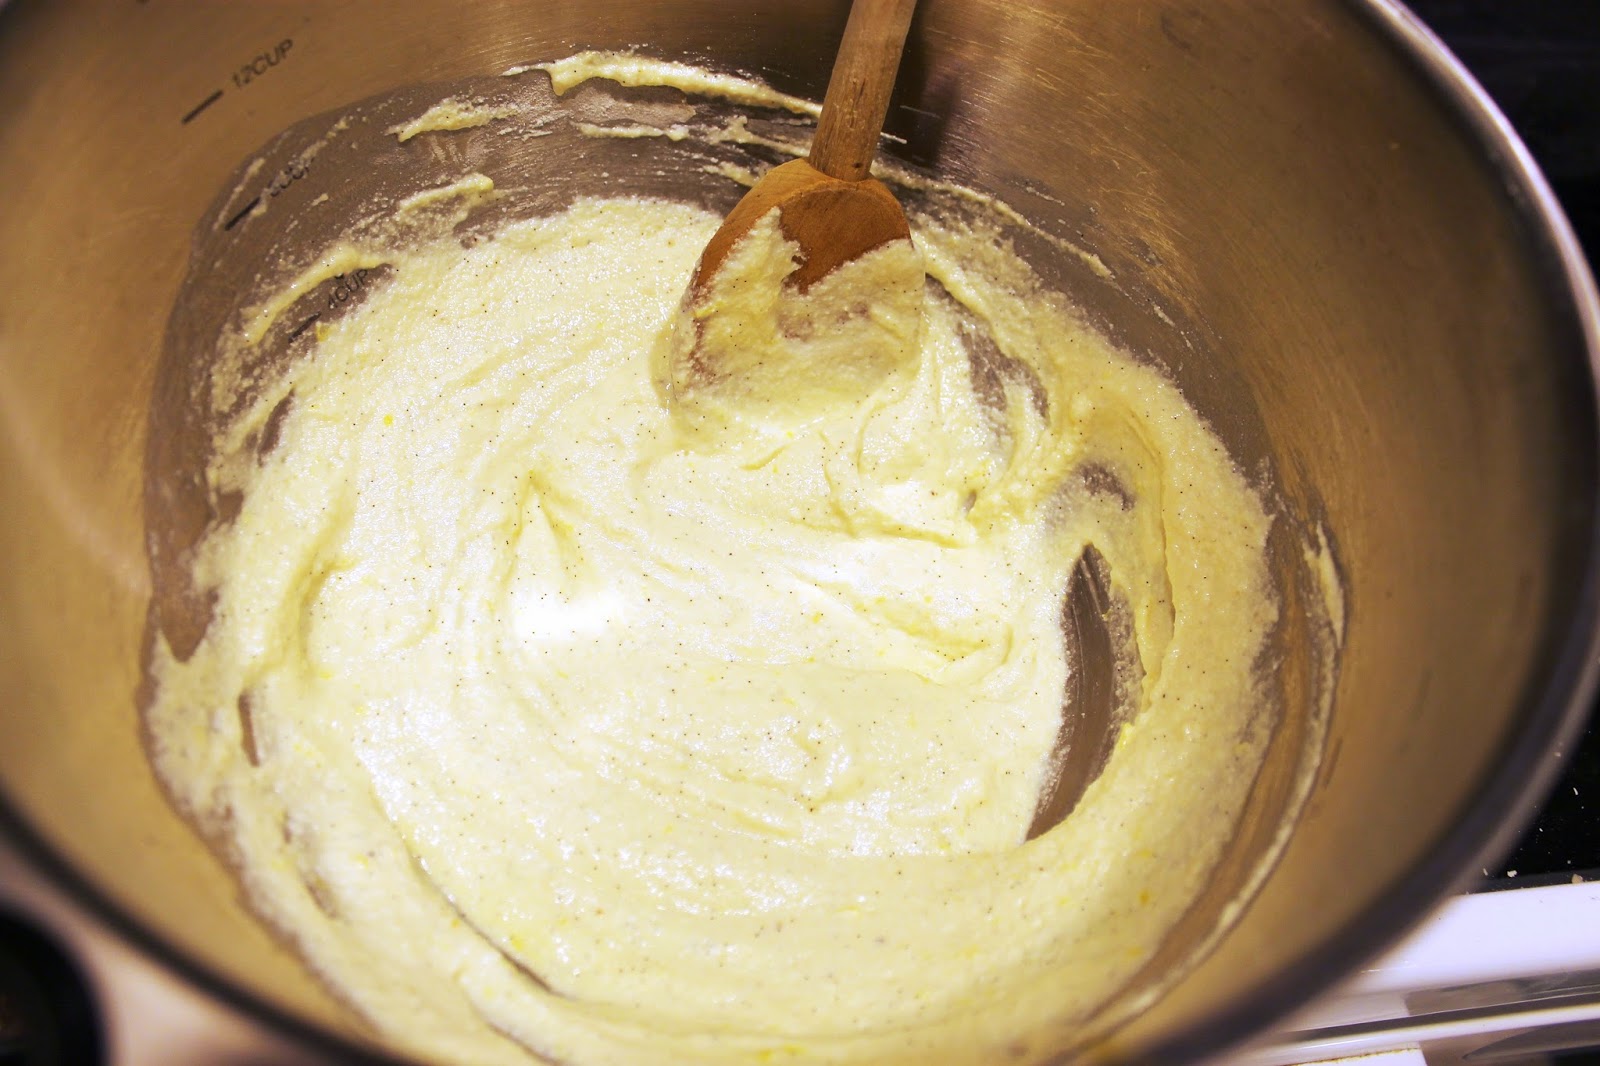
  • In a medium bowl, combine ricotta cheese, egg, vanilla extract, lemon zest and flour. (This is where you'd add vanilla bean, if you're using it. Simply scrape out as much or as little sweet vanilla caviar from the bean as you wish!) Mix everything together using a wooden spoon. Set aside.


  • You can either mix the berries into your cheese mixture, or leave them separate and use the berries to top the cheese mixture in your pastries later - it's up to you! 


  • Pull your dough out from the fridge, lay out on a cutting board, cut into whatever shapes you wish. (Note: You may want to flour your surface a little first, but you don't have to). 
  • Line a baking sheet with parchment paper, or use butter/ flour (this is my favorite method!) Simply spread the butter out on the sheet evenly with your fingers (make sure you wash your hands first), and sprinkle about 1/3 cup flour onto the baking sheet. Gently turn the sheet perpendicular to the floor, and shake the flour all across the sheet so it's coated evenly. Dump excess flour off the sheet. 
  • Finally, add your cheese mixture and berries into your pastries and roll/ close up as you wish. If you've mixed your cheese and berry mixtures together, gently fold it together now, being careful not to burst the berries. You want to get about 3-4tbsp. of the mixture into each pastry, regardless of how you do it. If you use the berries as a topping, just lay them on top however you wish! 
  • Bake 15-18 minutes, until pastry dough just begins to turn golden-brown. 

You can top with lemon curd, raw cane sugar, or even a simple glaze (4tbsp. confectioner's sugar + 3 tbsp. lemon juice). Or, leave it as-is!

Ta-da! You're done! Enjoy the deliciousness of these Blueberry Ricotta Breakfast Pastries!


Sunday, January 4, 2015

Christmas Gifts 2015

This may end up being a few posts, but for now, I'm posting the pictures I have on the card currently in my laptop!

These are the gifts I made for my MIL & SIL!

I decided to make them after having pinned this idea (version 2) over a year ago, and starting on my own bag in early December. Just to get to the point where the main parts of my bag were put together took the better part of 3 hours, and lots of input from my friends at the church's Ladies Craft & Sewing Night that I hosted! It was the first time I'd ever worked with interfacing OR done a pleat, but I learned so much! This project also combined my 3 biggest fears about sewing: gussets (no big deal at all), pleats and interfacing. Here's what I posted on Instagram about the progress on mine last month:

To be fair, none of these are perfect. But neither am I! I was intentionally wasteful with my "Paris" fabric (which I've had since last Christmas, planning to someday be brave and do this project), and I went ahead and cut it specifically so that the Eiffel Tower was centered. But I'm okay with that! In reality (and as we discussed at the craft & sewing night), I'll likely never use that same fabric for the same project again, anyway. So it's okay to be a little wasteful, and freeing not to have to line everything up so I'm saving as much fabric as possible! I like the pictures of my bag because they show the depth the other pictures don't (because I'm a Christmas picture slacker!)

I'll share more as I go...

Leah's bag - in front

Ashley's bag


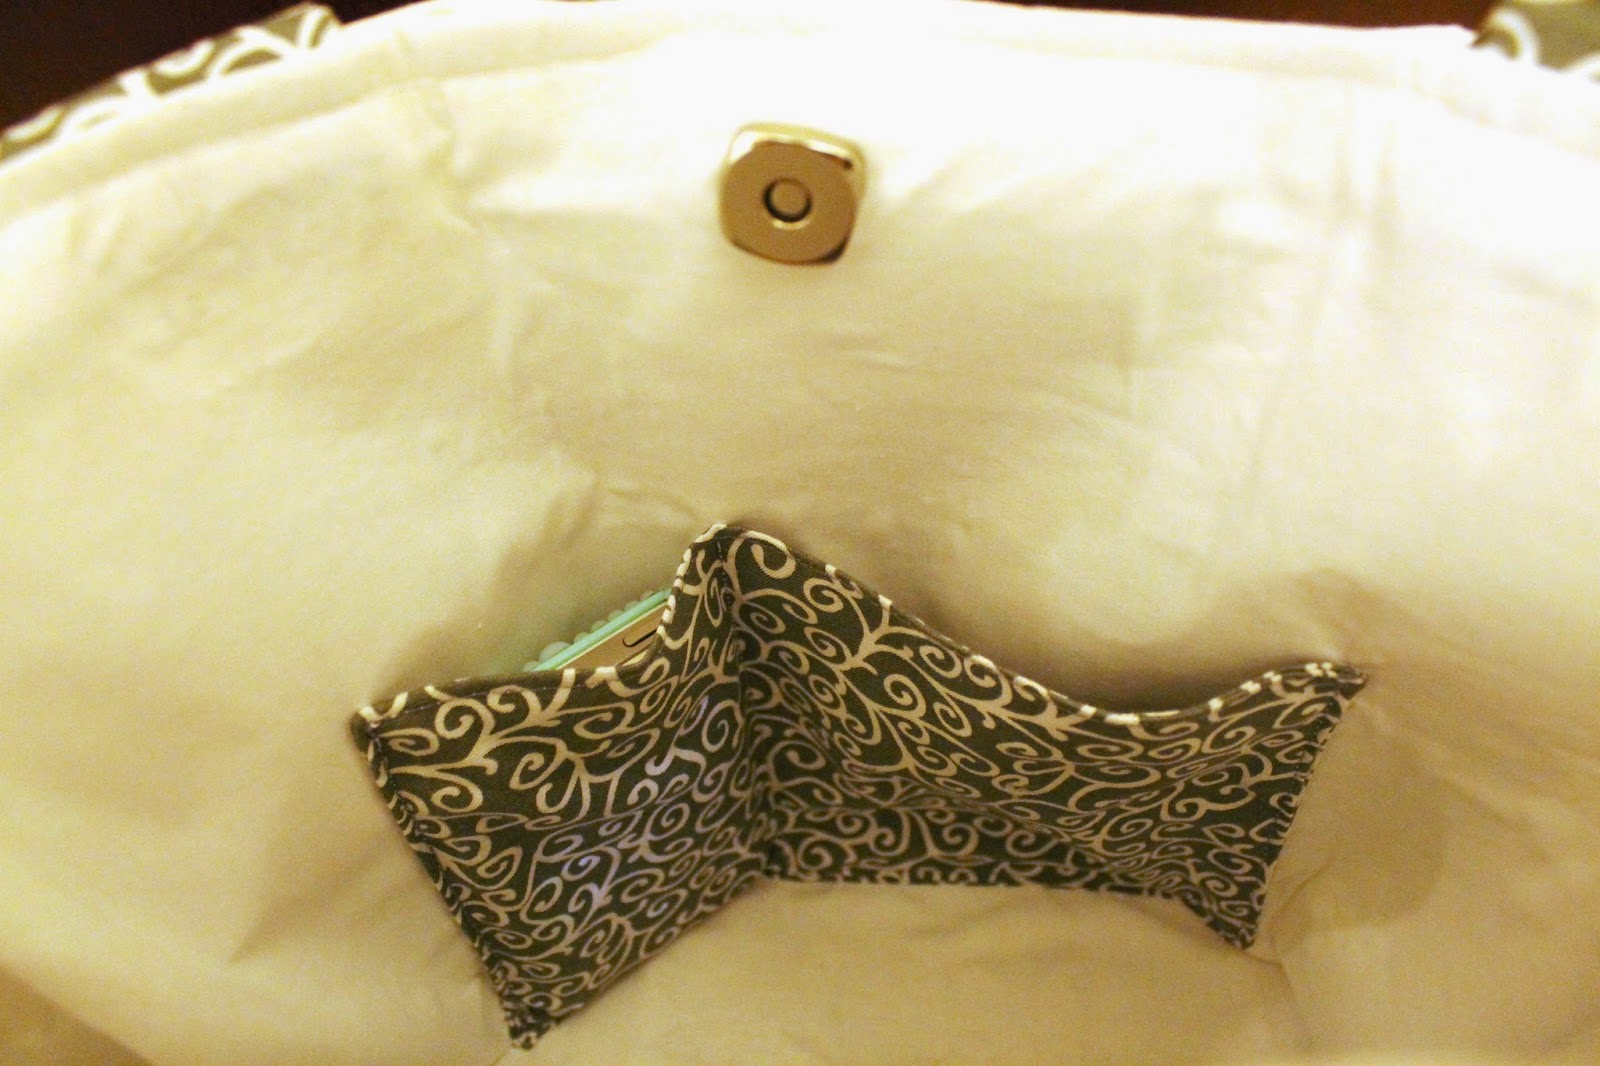
This is the inside of Leah's bag:
That's my Kindle, in the custom 7.5" tablet pocket

My iPhone looks so small in the custom S5
pocket!
Now for the inside of Ashley's:
There's my Kindle again! Ashley doesn't currently
own a tablet, but I'm sure she will someday,
or she can use this pocket for other random
stuff!

Ashley's custom S5 pocket & the other one, to
be used for pens or whatever she wants.
These bags were a lot of fun to make! I learned a lot about interfacing! Allow me to educate you as best as I can....

1) Interfacing is $1.37 per yard at Wal-Mart. The same (Pellon 808) interfacing is twice as much at any other fabric store (I got a lot of mine at JoAnn's). I have problems shopping at Wal-Mart, but for half the price for the same exact product, this may be a better option. When price is a concern, go for the cheapest.

2) Buy twice as much interfacing as you think you'll need. If you're anything like me, you'll mess up (I did, on my bag and Ashley's), and you'll have to pull it off and start again. Interfacing is mildly forgiving, and in my (limited) experience, you'll want backups.

3) Interfacing is not very wide! Again, purchase more than you think you need.

4) No matter what, do not purchase interfacing (at least, not medium - 808ish -) interfacing if it is wrinkled. No matter what a clerk tells you, it will NOT iron out completely flat! I ended up having to pull up soooo much interfacing because it caused the fabric to seize up and adhere to the wrinkles instead of ironing the interfacing flat. I know, I know - maybe my iron was the wrong temperature. Perhaps. But I don't think that was the case, since I tried it on 4 different temperatures (and I have a top-of-the-line iron). So when you buy it, make sure it's nice and flat. If the bolt that it's on is obviously wrinkled, get a new one. You're the customer; it's your money, so get the right product the first time!

5) Never, ever iron interfacing against the sticky/ shiny side. Essentially, the shiny side adheres to the fabric. I accidentally got about 1/4" tucked under the side I was ironing on mine, and it burned and smelled awful. Thankfully, I didn't make a bigger mistake! But make sure you iron on top of the interfacing - the NON-shiny side - with your fabric facing you upside-down. (Blech, that's super confusing, so if you're confused, email me!) 

On to the pleats!

You can't tell when you look at the bag, but it's about 1/4" off-center on the pleat.

I learned that you have to line everything up perfectly on the pleat, otherwise none of the rest of the bag comes together right. It looks beautiful no matter what, but make sure you get everything lined up to the 1/8" in if you're doing a centered pleat!
About the bows...It truly is the most beautiful part about these bags! To say that the bows weren't necessary would be a lie! They make the bag what it is! I absolutely loathed dealing with all the interfacing and the seams on the bows, probably because I'm inexperienced with interfacing. And I was making this bag twice, lol. But it was worth it!

I'm pretty sure my MIL & SIL liked the new handbags, and I may be selling them in my shop sometime... soonish... we'll see.

This is Leah, opening her bag!

Ashley, checking hers out after she unwrapped
it! (I missed the actual unwrapping, because
my daughter was pining for my attention!)
I gave them the option to share/ swap, but they were equally thrilled with the colors/ patterns I chose for them. To quote Ashley, "Nope; I like my chevron!"

I felt like I had a little bit more liberty with Ashley's to go a bit bold, but with Leah's I wanted to be professional, since she's always on the go for her new career! They both suited each of them perfectly. :)

Stay tuned for more posts about Christmas! (And Maui, and other stuff, lol)