Showing posts with label diy. Show all posts

Tuesday, April 12, 2016

Recent Projects and a Little Spring Cleaning

We have always got a project (or 5) going on here!

Ellie Jo running after her daddy on a recent
shopping excursion to the Home Depot
Especially since we had our neighbors' 80ft cedar tree fall on our house and property back in November, we've added many, many projects to our to-do list.

When we first bought this house in 2013, we knew we had a lot of work to do before we could even move in. There was nicotine running down the walls, and a horrible stench. It had popcorn ceilings, scratched hardwood floors, old doors and windows (single-pane aluminum glass), and 1/4 acre of unkept property.

With a lot of hard work, a lot of help from family and friends and determination, we moved in 2 months after we closed.


After we moved in, there were still many projects. The windows and sliding glass door, finishing the bathroom (including installing a new window), landscaping, etc.

What we didn't plan on was a rotten, unmaintained tree from our neighbors' yard hitting our house and property! Our punch list quickly grew. Items we lost when the tree fell included: Our BBQ, shed, canopy, outdoor heater, and hot tub. There was significant damage to parts of our house, mainly the roof. Our total settlement from our home owner's insurance company was plenty for us to do the work ourselves. But, it meant that a lot of our winter was consumed with repairs. We were able to replace the BBQ and outdoor heater, and we're planning to rebuild the shed and canopy. Speaking of which, this is one that I saw at Costco that I felt would work great for us:

But, that price wasn't working for Robert. He insisted that he could build one just as nice for about half the price.

So, recently, we placed a gigantic order with Lowe's, and the materials to build it are included! Yay!

This project is not as high on the list as others, though.
Ellie Jo on our adventure at Costco


We decided against replacing the hot tub for now. It's not a necessity, and we weren't using it anyway. We're using that money for projects around the house instead!

A lot of our purchases have been ordered online through Ebates so that we get cash back for all our purchases (I will be detailing the expenditure and savings tracking in an upcoming blog post). The only problem with ordering online is that sometimes, we don't know exactly what we're getting. A lot of the nuts and bolts (literally) aren't what Robert has been expecting, and the BBQ was quite the adventure... We ordered the biggest, most expensive BBQ we could find, because I got it on sale for an amazing price, and our insurance money covered the whole expense. (Yup, we got cash back from Ebates, too!) Anyway, when we got to the store to pick it up, they wheeled a box the size of a smart car around the corner at the Customer Service desk, and I thought Robert was going to pass out! He said, "Uh... so I guess there's not much assembly required?" We had to scramble to figure out how to get it home in the pouring rain, but luckily it worked out, thanks to his parents' perfect timing being at the store next door at the exact same time we needed to borrow their pick-up truck! Haha!

I was able to order our outdoor heater online. We went from a tabletop sized one to a full-size 7-ft tall outdoor heater! (We may be buying a second one, as I didn't realize that Robert wanted a different style than the one I bought).


My garden is a more pressing project, as I've already started to miss spring planting dates. But, as with  most things in my garden, it's pretty subjective. So I feel like waiting a bit is okay.

I saw this idea on Pinterest, and Robert said it wouldn't be difficult at all to build. We do have a different gate, which was given to us from my cousin, Melissa. But I am so excited for how this turns out! I'm planning to plant lower-growing crops like lettuce, carrots, potatoes, celery, etc. in this garden. My other two raised beds will still house my corn, artichokes, peas, beans, etc. We also have about 20ish pots (blueberries, peppers, tomatoes, etc.) I'll be posting an update on our garden plans soon.

For now, check out how much work Robert has done just since Saturday!

(Please ignore the weeds in my other garden to the right. It's been neglected for awhile).

I swear, my husband can build, fix or re-do anything. And he does a very respectable eye-roll when I start dumping Pinterest plans on him! Haha!


In addition to all that, I've been working to get some spring cleaning done. I have no official list - I'm just doing what needs the most attention. To be quite honest, we've just been accustomed to living in a renovation zone for the last 2 1/2 years, and it means that things are kind of crazy most of the time. Cleaning the 3 carpets we do have, the upholstery, and giving the floors a good cleaning in general were at the top of my list this year. I've already cleaned 2 of the 3 carpets, and I have to wait on the upholstery until we have an evening where I can do it quickly before bed. I also did a lot of toy sorting/ cleaning/ rearranging with my dad and Robert last week.

Here are some pics of the progress I've made with cleaning:

Ellie Jo's carpet


Living Room carpet


Ta-da! No more Mt. Vesuvius of toys in the
family room!


I swapped Elizabeth's toy box with her Princess shelves, and now the toy box houses toys in the family room, and the shelves are in her bedroom. Much cleaner! 


Before & After of my recent
painting project: hand-me-down
3-drawer bins that were reddish-
orange, and are now watermelon
pink!

Drawers to the left of Ellie Jo's play kitchen
area.


The only place I can put this for now to keep it
out of our way...
I recently purchased this Disney Princess Dream Castle thing on a buy/ sell/ trade site for $5. It retails on Amazon for $349.99! It was a little dirty and had some marker/ pen stains on it. I cleaned it right up with my favorite cleaning tool, a Mr. Clean Magic Eraser, and it looks brand new! (Of course, I sanitized the rest of it, taking apart what I could and soaking it in Lysol!) I called Mattel, and they shipped me all of the missing pieces for this! (I haven't received everything yet, but I'll take a picture when we get it all delivered!) What a deal! This may be the best deal I've ever scored!


Of course, we never miss our nightly FaceTime session with Grandpa, no matter how busy we are!


The blanket I made for my sweet friend's baby shower recently! I was inspired by one on Etsy, but I think mine came out decently, compared to the "perfect" one I saw online.


Here's Robert showing all his tools to Ellie, and
explaining the difference between the "Daddy,
Mommy and Ellie" sized hammers!
For Christmas, Robert's parents gave us 3 of our new windows! This was a huge and generous gift! They were custom-made for our house, so that we do not have to rebuild another wall (that is something that we now know how to do, but don't have time to do), and they even ordered us windows with grids in them for the front 2 (Ellie's room and my office) and one without the grid for the back bedroom (our master). Robert and I decided to I convinced Robert to install Elizabeth's window last weekend, because we were all home on a weekend day when she took an early nap! Opportunity!
He actually took baseball swings to get the metal
frame out, but I missed it with my camera :(

Helping Daddy remove screws


Because no home improvement project is complete
without an impromptu trip to Home Depot.


What the window(s) looked like before: Aluminum,
single-pane glass with a storm window (ew).

Finishing touches installing the window itself
(obviously, we still have to do some drywall)

The new sill I insisted on, haha!


A project I decided needed to happen... our Master
Bedroom closet doors. I've always wanted bi-fold
doors (I cannot stand bypass doors!), and I
found them at Home Depot this weekend. I said
that I couldn't possibly paint/ prep them if I didn't
own them, ha! Many trips in our SUV have this view...

The last picture doesn't look like much, I know. But Robert and our friend, Jeff, spent 13 hours (13 hours!) on Saturday, clearing all the debris and yard waste from the tree falling. They hauled 3 full dump trailer loads to the dump, totaling around $200. It was about 3.5 tons of stuff! WOW! 

Needless to say, this picture is progress. PROGRESS! 

As you can see, we're busy! We have a lot going on, and we like it that way. Ellie Jo is learning a lot about what we can do with what we have, and how to use simple tools like hammers and Daddy's power tools (just the screwdriver function, and only with help). 

*Disclaimer: If you follow me on Instagram, you've already seen a lot of these pictures. And if your name is Keri, you've already seen all this in our most recent texting conversations, haha!

Friday, July 24, 2015

DIY Reusable Kcups

Recently, we were blessed with a Keurig Kcup coffee maker - all I had to do was make it work, lol! It needed a good cleaning and some TLC, but I got it up and running.

Quickly, I realized how expensive this could become, if I wasn't resourceful.

I decided to make my own Kcups. Check it out!

You start with something like this: A used Kcup. (Make sure it's cooled down).
1) Cut the foil off the top. It's easiest for me (though a bit messy) to start in the middle.
2) Peel off any excess.
Now you have this....
3) Carefully cut the old filter out. (I started with a small cut, and peeled it out with my fingers.) Also remove the plastic filter at the bottom.
4) Your Kcup is now clear of any materials. Rinse it out with cool water, making sure to get all the coffee grounds.
5) Insert a cone or flat coffee filter into the used Kcup.
6) Push it down into the Kcup, molding it to the bottom as much as possible.
7) Fold the sides of the paper coffee filter back over the side of the Kcup.
8) Pinch the sides around the Kcup, gathering the coffee filter as you go.
9) Cut away the excess paper, leaving a small lip around the top edge.
10) Fill with your favorite coffee! (Only about 3/4 full).
11) Cut a piece of foil, approx. 9" x 6", fold it in thirds the long way.
12) Fold it in thirds again, measuring about 3" x 4".

13) Fold the foil over your cup. You want a few layers on the top, and some overhang. (Otherwise, you get a big mess, and grounds in your coffee. No thanks!)
14) Pinch the foil around the top edge of the Kcup, just as you did with the paper coffee filter. Done!
Make sure you line up the original hole in the bottom of the Kcup with the needle in the brewing compartment on your machine. This leaves less room for error, spills and grounds in your coffee.


Enjoy!

Sunday, January 4, 2015

Christmas Gifts 2015

This may end up being a few posts, but for now, I'm posting the pictures I have on the card currently in my laptop!

These are the gifts I made for my MIL & SIL!

I decided to make them after having pinned this idea (version 2) over a year ago, and starting on my own bag in early December. Just to get to the point where the main parts of my bag were put together took the better part of 3 hours, and lots of input from my friends at the church's Ladies Craft & Sewing Night that I hosted! It was the first time I'd ever worked with interfacing OR done a pleat, but I learned so much! This project also combined my 3 biggest fears about sewing: gussets (no big deal at all), pleats and interfacing. Here's what I posted on Instagram about the progress on mine last month:

To be fair, none of these are perfect. But neither am I! I was intentionally wasteful with my "Paris" fabric (which I've had since last Christmas, planning to someday be brave and do this project), and I went ahead and cut it specifically so that the Eiffel Tower was centered. But I'm okay with that! In reality (and as we discussed at the craft & sewing night), I'll likely never use that same fabric for the same project again, anyway. So it's okay to be a little wasteful, and freeing not to have to line everything up so I'm saving as much fabric as possible! I like the pictures of my bag because they show the depth the other pictures don't (because I'm a Christmas picture slacker!)

I'll share more as I go...

Leah's bag - in front

Ashley's bag


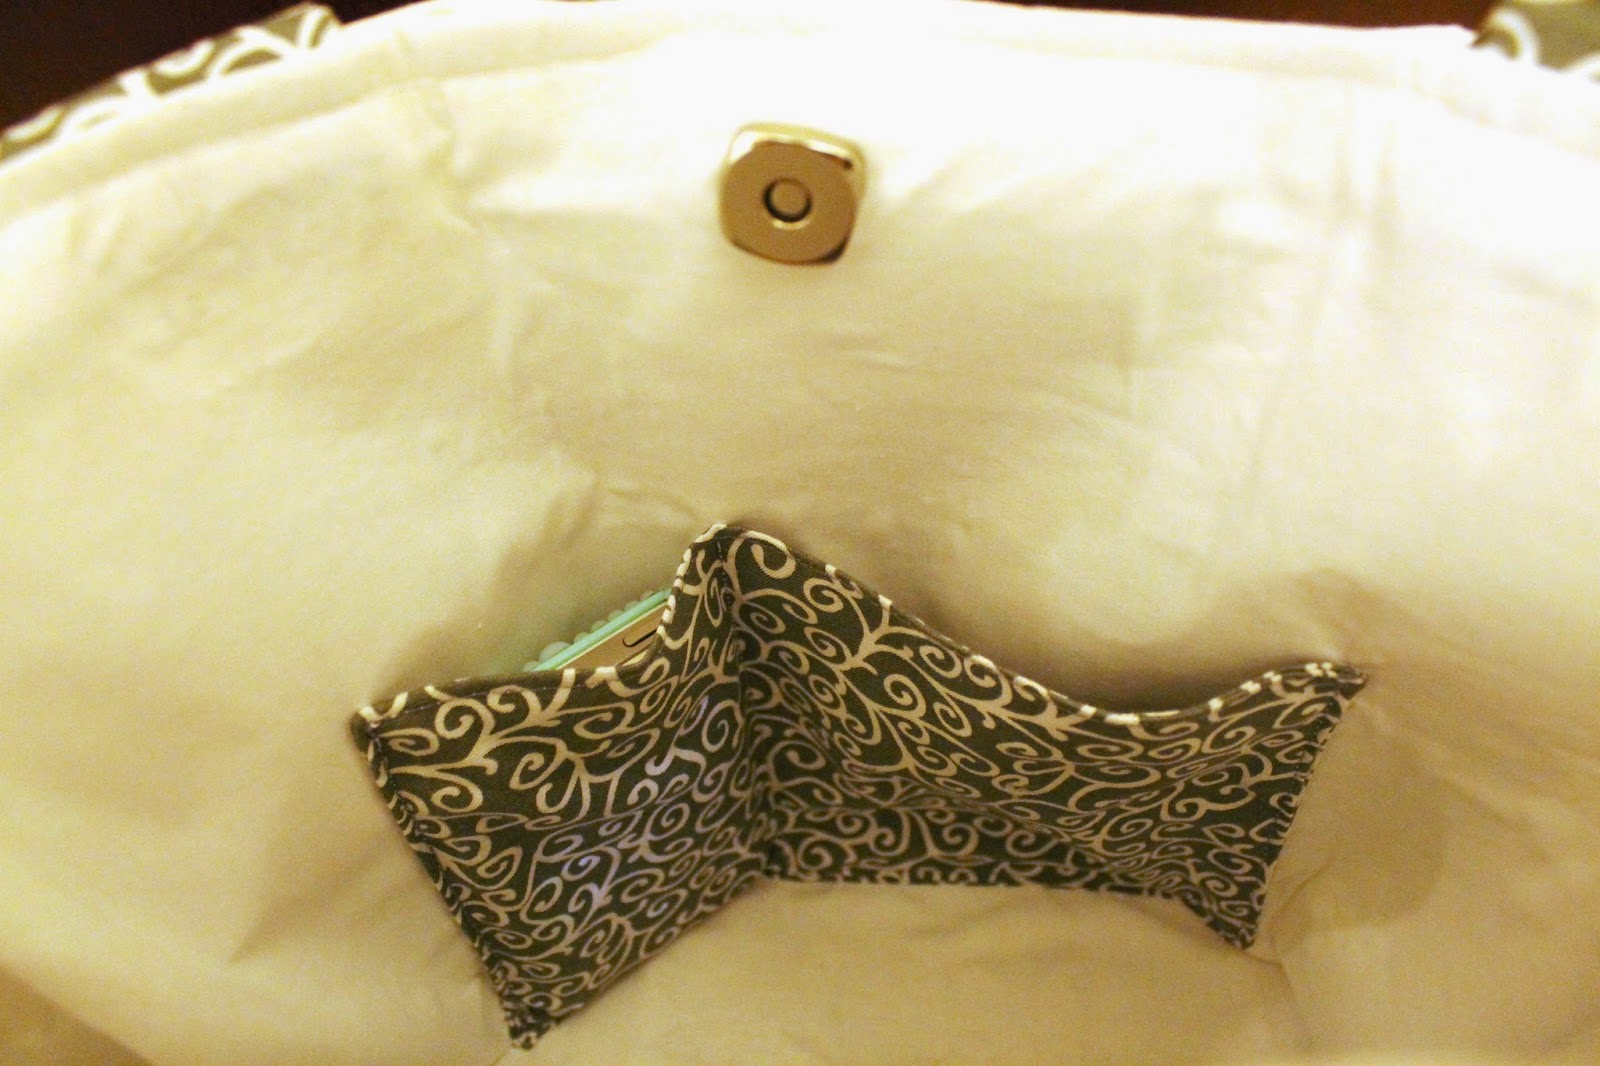
This is the inside of Leah's bag:
That's my Kindle, in the custom 7.5" tablet pocket

My iPhone looks so small in the custom S5
pocket!
Now for the inside of Ashley's:
There's my Kindle again! Ashley doesn't currently
own a tablet, but I'm sure she will someday,
or she can use this pocket for other random
stuff!

Ashley's custom S5 pocket & the other one, to
be used for pens or whatever she wants.
These bags were a lot of fun to make! I learned a lot about interfacing! Allow me to educate you as best as I can....

1) Interfacing is $1.37 per yard at Wal-Mart. The same (Pellon 808) interfacing is twice as much at any other fabric store (I got a lot of mine at JoAnn's). I have problems shopping at Wal-Mart, but for half the price for the same exact product, this may be a better option. When price is a concern, go for the cheapest.

2) Buy twice as much interfacing as you think you'll need. If you're anything like me, you'll mess up (I did, on my bag and Ashley's), and you'll have to pull it off and start again. Interfacing is mildly forgiving, and in my (limited) experience, you'll want backups.

3) Interfacing is not very wide! Again, purchase more than you think you need.

4) No matter what, do not purchase interfacing (at least, not medium - 808ish -) interfacing if it is wrinkled. No matter what a clerk tells you, it will NOT iron out completely flat! I ended up having to pull up soooo much interfacing because it caused the fabric to seize up and adhere to the wrinkles instead of ironing the interfacing flat. I know, I know - maybe my iron was the wrong temperature. Perhaps. But I don't think that was the case, since I tried it on 4 different temperatures (and I have a top-of-the-line iron). So when you buy it, make sure it's nice and flat. If the bolt that it's on is obviously wrinkled, get a new one. You're the customer; it's your money, so get the right product the first time!

5) Never, ever iron interfacing against the sticky/ shiny side. Essentially, the shiny side adheres to the fabric. I accidentally got about 1/4" tucked under the side I was ironing on mine, and it burned and smelled awful. Thankfully, I didn't make a bigger mistake! But make sure you iron on top of the interfacing - the NON-shiny side - with your fabric facing you upside-down. (Blech, that's super confusing, so if you're confused, email me!) 

On to the pleats!

You can't tell when you look at the bag, but it's about 1/4" off-center on the pleat.

I learned that you have to line everything up perfectly on the pleat, otherwise none of the rest of the bag comes together right. It looks beautiful no matter what, but make sure you get everything lined up to the 1/8" in if you're doing a centered pleat!
About the bows...It truly is the most beautiful part about these bags! To say that the bows weren't necessary would be a lie! They make the bag what it is! I absolutely loathed dealing with all the interfacing and the seams on the bows, probably because I'm inexperienced with interfacing. And I was making this bag twice, lol. But it was worth it!

I'm pretty sure my MIL & SIL liked the new handbags, and I may be selling them in my shop sometime... soonish... we'll see.

This is Leah, opening her bag!

Ashley, checking hers out after she unwrapped
it! (I missed the actual unwrapping, because
my daughter was pining for my attention!)
I gave them the option to share/ swap, but they were equally thrilled with the colors/ patterns I chose for them. To quote Ashley, "Nope; I like my chevron!"

I felt like I had a little bit more liberty with Ashley's to go a bit bold, but with Leah's I wanted to be professional, since she's always on the go for her new career! They both suited each of them perfectly. :)

Stay tuned for more posts about Christmas! (And Maui, and other stuff, lol)